Featured Project Return to Projects List
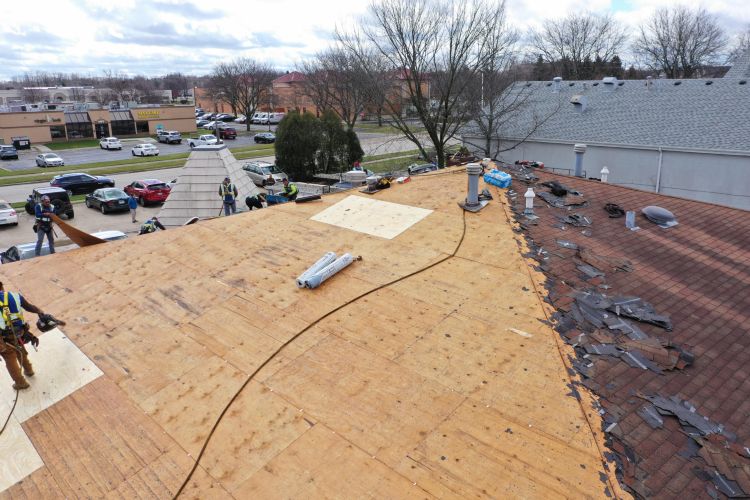
Commercial Shingles Replacement
Project Information
- Project Location:
- Chicago, IL
- Status:
- Completed - May 2021
- Structure Type:
- Non-Residential Building
Products Used:
Employment Agencies:
Rotten Wood/Metal Roofing
Roofing Contractors
Shingle Roofing
Skilled Roofing Labor
Skilled And Trained Workforce
All Roofing Types
Gutters & Downspouts:
Rotten Wood/Metal Roofing
Roofing Contractors
Shingle Roofing
Skilled Roofing Labor
Skilled And Trained Workforce
All Roofing Types
Roofing Contractors:
Roofing Contractors
Shingle Roofing
Skilled Roofing Labor
Skilled And Trained Workforce
All Roofing Types
Siding Contractors:
Rotten Wood/Metal Roofing
Roofing Contractors
Shingle Roofing
Skilled Roofing Labor
Skilled And Trained Workforce
All Roofing Types
Services Rendered:
Employment Agencies:
Rotten Wood/Metal Roofing
Roofing Contractors
Shingle Roofing
Skilled Roofing Labor
Skilled And Trained Workforce
All Roofing Types
Gutters & Downspouts:
Rotten Wood/Metal Roofing
Roofing Contractors
Shingle Roofing
Skilled Roofing Labor
Skilled And Trained Workforce
All Roofing Types
Roofing Contractors:
Roofing Contractors
Shingle Roofing
Skilled Roofing Labor
Skilled And Trained Workforce
All Roofing Types
Scope Of Work
- First, we prepared the necessary tools and equipment, such as a hammer, roofing nails, a pry bar, a utility knife, and safety gear.
- We started by removing the old shingles using the pry bar. We carefully lifted each shingle and pulled out the nails that held it in place.
- Once all the old shingles were removed, we inspected the roof deck for any damage or rot. We replaced any damaged areas before proceeding.
- We then installed a layer of roofing felt, starting at the bottom edge of the roof and working our way up. We used roofing nails to secure the felt to the roof deck.
- Next, we installed a layer of starter shingles along the bottom edge of the roof. We used roofing nails to secure them in place.
- We then installed the first row of shingles, starting at the bottom edge of the roof and working our way up. We used four nails per shingle, placed about an inch above the cutout.
- For subsequent rows, we staggered the shingle placement so that the cutouts didn't line up with each other. This provided better protection against leaks.
- We continued installing shingles in this manner until we reached the top of the roof.
- At the ridge, we installed ridge shingles to provide a finished look and extra protection against leaks. We secured them with roofing nails.
- Finally, we cleaned up the job site, disposing of any old shingles and debris, and double-checked our work to make sure everything was secure and in place.
And that's it! With proper tools, materials, and safety precautions, tearing off and installing shingles can be a relatively straightforward process.
Project Images


